
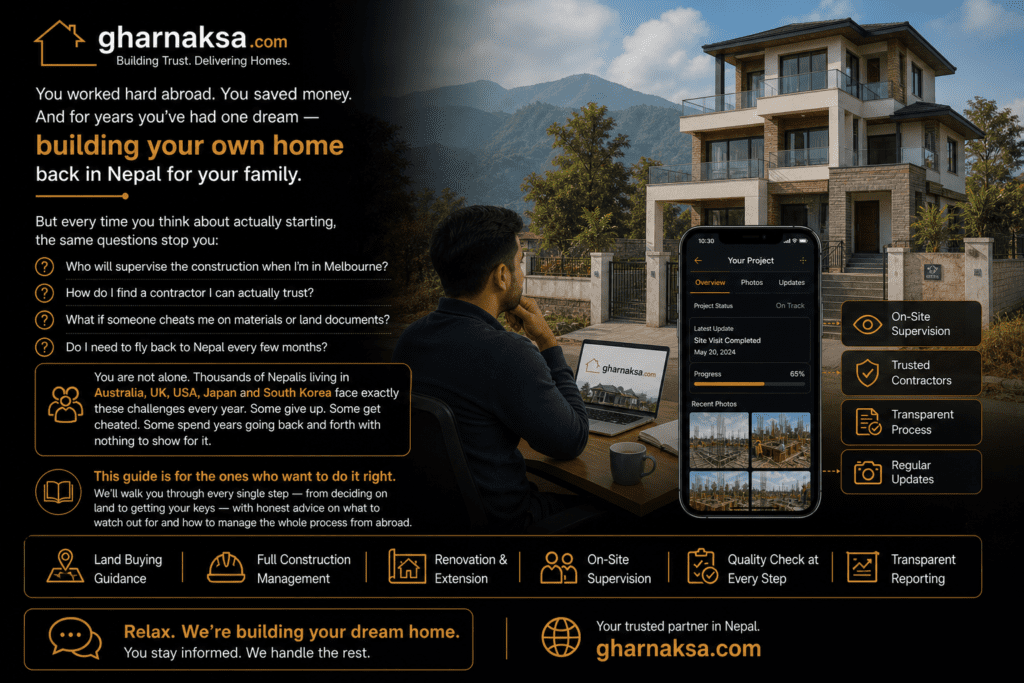
You worked hard abroad. You saved money. And for years you’ve had one dream — building your own home back in Nepal for your family.
But every time you think about actually starting, the same questions stop you:
Who will supervise the construction when I’m in Melbourne?
How do I find a contractor I can actually trust?
What if someone cheats me on materials or land documents?
Do I need to fly back to Nepal every few months?
You are not alone. Thousands of Nepalis living in Australia, UK, USA, Japan and South Korea face exactly these challenges every year. Some give up. Some get cheated. Some spend years going back and forth with nothing to show for it.
This guide is for the ones who want to do it right.
Helpful GharNaksa links: See our site monitoring guide, house design guide, land guidance, and home building services. You can also read about GharNaksa and our low budget cafe interior design guide.
We’ll walk you through every single step — from deciding on land to getting your keys — with honest advice on what to watch out for and how to manage the whole process from abroad.
Table of Contents
1. Can You Legally Build a House in Nepal as an NRN?
Yes — but there are rules you need to understand before you spend a single rupee.
If you hold a foreign citizenship (NRN card holder):
- You can own land and property in Nepal
- There are restrictions on the amount of land you can purchase in certain areas
- You cannot buy agricultural land and convert it for residential use without proper approval
- All transactions must go through official banking channels — cash deals are illegal and risky
If you still hold a Nepali citizenship:
- You have full rights to buy land and build anywhere in Nepal
- No restrictions on land size or type
Key document you need: Your citizenship certificate or NRN card, and a trusted family member or lawyer in Nepal who can act on your behalf through a Power of Attorney (Mukhtyarnaama).
This is the first thing to sort out before anything else. Without a proper Power of Attorney, you cannot buy land, sign contracts or get permits while you are abroad.
2. Step 1 — Planning Your Budget Realistically
This is where most people go wrong. They underestimate costs by 30–50% and run out of money halfway through construction. That is one of the worst situations you can be in.
Here is a realistic breakdown for 2026:
Land costs (Kathmandu Valley)
- Prime areas (Budhanilkantha, Sitapaila, Baneshwor): Rs. 80 lakh – 2 crore per anna
- Mid-range areas (Bhaktapur, Lalitpur outskirts): Rs. 20–60 lakh per anna
- Outer ring (Tikathali, Lubhu, Thankot): Rs. 8–25 lakh per anna
Outside Kathmandu Valley — Pokhara, Chitwan, hometown areas — land is significantly cheaper.
Construction costs per square foot (2026)
- Basic finish: Rs. 2,500 – 3,500 per sq ft
- Standard finish: Rs. 3,500 – 5,000 per sq ft
- Premium finish: Rs. 5,000 – 8,000+ per sq ft
Example total budget for a 2.5 storey house on 3 anna land in mid-Kathmandu:
| Item | Estimated Cost |
|---|---|
| Land (3 anna, mid-range) | Rs. 60–90 lakh |
| Construction (1,800 sq ft standard) | Rs. 70–90 lakh |
| Interior finishing | Rs. 15–25 lakh |
| Naksa pass + permits | Rs. 1–3 lakh |
| Miscellaneous + buffer (10%) | Rs. 15–20 lakh |
| Total estimate | Rs. 1.6 – 2.3 crore |
Always add a 15–20% buffer. Material prices change. Unexpected ground conditions happen. Labour costs fluctuate. The buffer saves you from stopping construction halfway.
3. Step 2 — Finding and Buying the Right Land
Land is your most important decision. A bad land purchase can cost you years of legal headaches.
How to search for land from abroad
- Ask trusted family members to physically visit and send photos and videos
- Use platforms like Hamro Property or Ghar Jagga Nepal for listings
- Never buy based on photos alone — always get someone you trust to walk the land
- Consider hiring a local property consultant for an independent assessment
Documents to verify before buying
Every piece of land in Nepal has a paper trail. Before paying anything, verify:
- Lalpurja (Land Ownership Certificate) — confirms who legally owns the land
- Tiro Tireko (Tax clearance) — confirms all land taxes are paid up to date
- Napi Naksa (Survey map) — confirms the exact boundaries of the land
- Field verification — physically walk the land and confirm boundaries match the survey map
- Check for disputes — ask neighbours, check at the local ward office
Red flags to watch out for
- Seller is in a big hurry to close the deal
- Price is significantly below market rate
- Cannot produce original Lalpurja
- Land has multiple owners and not all are present
- Land is near a river, road widening zone or government land
The transaction process
Land transactions in Nepal must go through the Malpot office (Land Revenue Office). The buyer and seller (or their Power of Attorney representatives) must appear in person. Payment must go through the banking system — never pay cash for land.
4. Step 3 — House Design and Getting Your Naksa Approved
Once you have land, you need a house design that can get approved by your local municipality — this is called Naksa Pass.
What is Naksa Pass?
Naksa Pass is the official building permit in Nepal. Without it, your construction is illegal and can be demolished. Getting it right is non-negotiable.
How the design process works
- Hire a licensed civil engineer or architect in Nepal
- They survey your land and prepare construction drawings
- Drawings are submitted to your local municipality or metropolitan office
- Municipality reviews and approves (or requests changes)
- You receive your Naksa Pass and can legally begin construction
How long does Naksa Pass take?
- Kathmandu Metropolitan: 15–45 working days typically
- Smaller municipalities: Can vary — sometimes faster, sometimes longer
- Having a complete application with no errors speeds things up significantly
Design considerations for Nepalis abroad
- Think about how your family will actually live in the house — not just how it looks
- Plan for future: extra room for parents, space for a tenant for rental income
- Consider earthquake resistance — Nepal is in a high seismic zone, proper construction standards are not optional
- Discuss sun direction, ventilation and natural light with your architect — these matter more than most people realise
Building setback rules
Every municipality has rules about how close you can build to your land boundary. These vary by area and road width. Your architect must factor these in or your Naksa will be rejected.
5. Step 4 — Finding and Hiring a Trustworthy Contractor
This is the step where most people abroad get into trouble.
Finding a good contractor in Nepal from abroad — without a local network — is genuinely difficult. And a bad contractor is not just an inconvenience. It means delayed timelines, poor quality work, materials disappearing and sometimes half-finished buildings.
Types of contractors in Nepal
Labour contractor (Thekedar): Provides labour only. You buy all materials separately. More control but more work.
Material + labour contractor: Handles both. Easier to manage but requires you to trust their material sourcing completely.
Turnkey contractor: Handles everything end to end for a fixed price. Best for people managing from abroad — but requires a very detailed contract.
How to find reliable contractors
- Ask for referrals from people who have recently built in Nepal — word of mouth is the most reliable
- Check if they have completed similar projects (ask for photos and references)
- Visit one of their completed projects if possible
- Never hire someone you cannot independently verify
What your contract must include
Do not start construction without a written contract that covers:
- Scope of work in detail
- Material specifications (brand, grade, quantity)
- Payment schedule tied to milestones — not time
- Timeline with penalty clause for delays
- Clause for photo and video reporting
- Dispute resolution process
Payment structure — never pay everything upfront
A typical payment schedule:
- 20–25% on signing + materials mobilisation
- 25% on completion of foundation
- 25% on completion of structure (columns, beams, slab)
- 20% on completion of brick and plaster work
- 10% on final handover after inspection
6. Step 5 — Managing Construction from Abroad
This is the hardest part. You cannot be there every day. But with the right systems, you can stay in full control.
Set up a reporting system from day one
Agree with your contractor or site supervisor that they will send you:
- Daily WhatsApp updates with at least 3–5 photos
- Weekly video walkthrough of the entire site
- Monthly written progress report
If a contractor refuses this — that is a red flag. Good contractors welcome transparency.
Hire an independent site supervisor
Even if your contractor is trustworthy, having an independent civil engineer visit the site every 1–2 weeks is one of the best investments you can make. They check:
- Concrete mix ratios
- Rebar placement and spacing
- Material quality (cement brand, brick quality)
- Work matching the approved drawings
Their fee — typically Rs. 15,000–30,000 per month — is nothing compared to the cost of fixing poor construction later.
Use video calls to stay involved
Schedule a monthly video call where your site supervisor walks you around the site live. Ask questions. Ask to see specific things. Being visibly engaged keeps everyone accountable.
Watch for these warning signs remotely
- Contractor stops sending updates without explanation
- Progress seems too fast (corners being cut) or too slow
- Requests for extra money before agreed milestones are reached
- Vague answers about material brands or quantities used
7. Step 6 — Interior Finishing and Handover
Construction finishing — tiles, plumbing fixtures, electrical fittings, paint, doors and windows — accounts for 20–35% of your total budget and has a massive impact on how your home looks and feels.
Plan your finishes early
Do not leave interior decisions until the walls are up. By then you are rushed and end up with whatever the contractor suggests. Instead:
- Decide on tile sizes and designs before floor work begins
- Choose bathroom fixtures before plumbing rough-in
- Agree on door and window designs before frame installation
Budgeting for finishes
| Item | Budget range |
|---|---|
| Tiles (floor + bathroom) | Rs. 3–8 lakh |
| Sanitary fittings | Rs. 2–5 lakh |
| Electrical fittings | Rs. 1.5–4 lakh |
| Doors and windows | Rs. 3–7 lakh |
| Paint (interior + exterior) | Rs. 1.5–3 lakh |
| Kitchen | Rs. 3–10 lakh |
Final inspection before handover
Before you make the final payment, do a thorough inspection — either yourself or through a trusted person:
- Check all electrical points and switches work
- Run all taps and check for leaks
- Check every door and window opens and closes properly
- Check roof for any signs of water leakage
- Compare finished work against original drawings
Only make final payment when you are satisfied.
8. Common Mistakes Nepalis Abroad Make
Learning from others’ mistakes is cheaper than making your own.
Trusting without verifying
Just because someone is a relative or family friend does not mean they will not cut corners. Always have independent verification — of land documents, contractor work and material quality.
Sending too much money at once
Never transfer a large lump sum. Always tie payments to specific milestones that have been physically verified.
Skipping the written contract
A verbal agreement is worthless when something goes wrong. Always have a written contract, even if it feels awkward with someone you know.
Choosing the cheapest contractor
In Nepal’s construction industry, cheap usually means inexperienced, under-resourced or planning to cut corners. The cheapest quote is rarely the best value.
Not visiting at key construction stages
If you can only make one trip to Nepal during construction, time it for the structural stage — after foundation and before roof slab. This is when the most critical work happens and when your presence matters most.
Ignoring earthquake safety
Nepal is one of the world’s most earthquake-prone countries. Do not compromise on column sizes, rebar specifications or concrete grades to save money. This is not negotiable.
9. How Long Does It Really Take?
Here is a realistic timeline for a 2.5 storey house from scratch:
| Phase | Realistic timeframe |
|---|---|
| Land search and purchase | 1–6 months |
| Design and Naksa Pass approval | 2–4 months |
| Foundation and structure | 4–6 months |
| Brick, plaster, roof | 3–4 months |
| Finishing (tiles, electrical, plumbing) | 3–5 months |
| Final touches and handover | 1–2 months |
| Total | 14–27 months |
Anyone who tells you they can build a full house in 6 months is either cutting serious corners or not telling you the truth.
10. How GharNaksa Can Help
Everything in this guide — the land verification, the contractor vetting, the naksa pass process, the site supervision, the weekly updates — is exactly what we do for our clients.
GharNaksa was built specifically for Nepalis living abroad who want to build a home in Nepal without the stress, the scams and the sleepless nights.
We act as your trusted local partner — from the first conversation to the day we hand you your keys.
What we offer:
- Free initial consultation — we listen to your project and give you honest advice
- House design consultation with experienced Nepali architects
- Verified contractor connections from our personally vetted network
- Land buying guidance and document verification
- Full construction management with weekly photo and video reports
- Interior design and finishing supervision
- NRN property and naksa pass guidance
Who we work with:
Nepalis living in Australia, UK, USA, Japan, South Korea, UAE, Qatar and anywhere else in the world.
Ready to start?
Fill in our free consultation form and we’ll get back to you within 24 hours. No commitment, no pressure — just an honest conversation about your dream home.
Start your free consultation →
Have questions? WhatsApp us directly at +977-9713551462 or email [email protected]. We reply in Nepali or English — whichever you prefer.